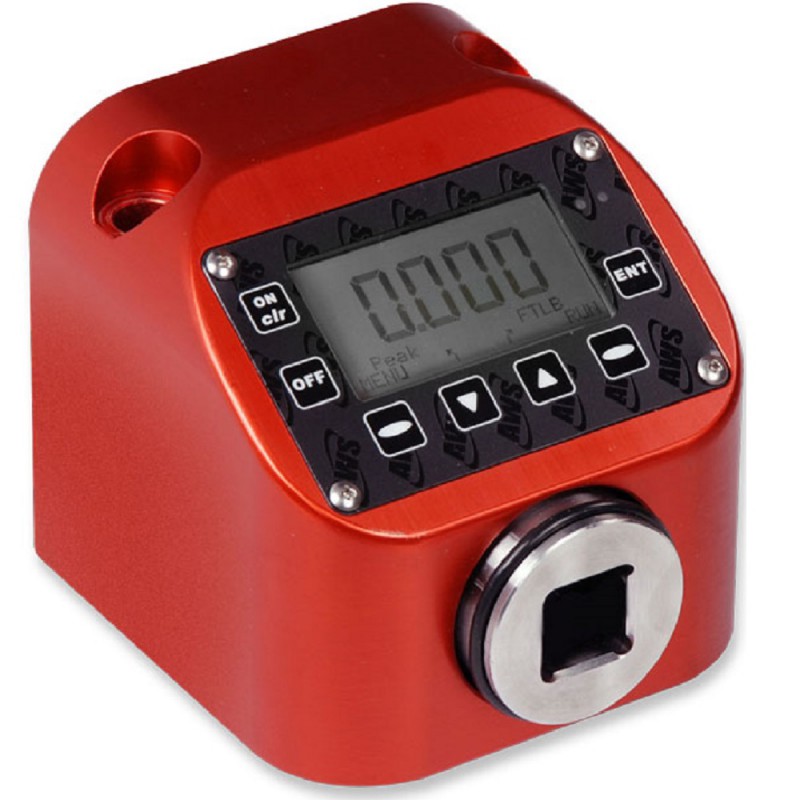
TT-QCM Torque Tool Tester for torque tool calibration
The TT-QCM Torque Calibrator is perfect for testing and calibrating click, dial and digital keys, as well as most electrical tools, including pulse and DC electronics, various torque wrenches and torque devices.
The memory of the TT-QCM test device is designed for up to 999 data points, which can be stored in the device for later viewing, or can be transmitted to a printer or PC via the RS232 interface.
A large LCD display with an easy menu control enables a quick set up. High and low limits can be set easily and the front mounted LED lamp gives a visual indication as soon as the torque reaches the set limits. The system is also equipped with internal transducers in vertical or horizontal configuration that can easily be switched by the user.
*Please note that a screw simulator is required for the use of electrical, hydraulic and pneumatic tools.
This device is not suitable for the inspection of impact wrenches or for use with force multipliers.
Features
- Bidirectional accuracy of ± 0.5% of indicated reading (± 0.25% is optional)
- NiMH rechargeable batteries provide up till 10 hours continuous use
- CE Certified and NIST Calibration Certificate
- Rugged Aluminum Housing
- 3 modes of operation: Track, Peak and 1st Peak
- Eight (8) selectable engineering units: Oz.in., Lb.in., Lb.ft., Nm, cNm, KgfCm, gfCm, Kgfm
Torque ranges
| Model | Range | Drive Size | Run-down fixture | ||
| TT-QCMIO-50* | 0.0 - 0.3 N-m | 1/4" | Y | ||
| TT-QCMIO-100 | 0.07 - 0.7 N-m | 1/4" | Y | ||
| TT-QCM-10i | 0.11 - 1.2 N-m | 1/4" | Y | ||
| TT-QCMIO-200 | 0.14 - 1.4 N-m | 1/4" | Y | ||
| TT-QCM-25i | 0.28 - 2.8 N-m | 1/4" | Y | ||
| TT-QCM-50i | 0.56 - 5.6 N-m | 1/4" | Y | ||
| TT-QCM-100i | 1.12 - 11.2 N-m | 1/4" | Y | ||
| TT-QCM-150i | 1.6 - 16 N-m | 1/4" | Y | ||
| TT-QCM-250i | 2.8 - 28 N-m | 3/8" | Y | ||
| TT-QCM-500i | 5.6 - 56 N-m | 3/8" | Y | ||
| TT-QCM-750i | 8.4 - 84 N-m | 3/8" | Y | ||
| TT-QCM-1000i | 11.2 - 112 N-m | 3/8" | Y | ||
| TT-QCM-100F | 13.5 - 135 N-m | 1/2" | Optional | ||
| TT-QCM-150F | 20 - 203 N-m | 1/2" | Optional | ||
| TT-QCM-250F | 33 - 338 N-m | 1/2" | Optional | ||
| TT-QCM-500F | 67 - 670 N-m | 3/4" | Optional | ||
| TT-QCM-600F | 81 - 810 N-m | 3/4" | Optional | ||
| TT-QCM-750F | 101 - 1016 N-m | 3/4" | Optional | ||
| TT-QCM-1000F** | 135 - 1350 N-m | 1" | Optional | ||
| TT-QCM-2000F** | 271 - 2710 N-m | 1" | Optional | ||
*QCMIO-50 accuracy is +/-1% from 10-100% of capacity
**Ranges over 1000 N-m are supplied as cable connected external sensors. Please contact us for more information.
All 1/4" and 3/8" Drive transducers are supplied with run-down fixtures.
ER - Extended Range Option increases certified range to 5-100% (instead of 10-100%)
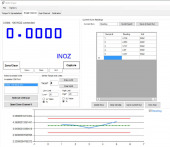
SMD-SC Torque software for data collection & analysis
- Shows Live Reading and Measurement Units of the Tester Connected.
- Direct Export to Microsoft Excel
- For use with TT-Series Torque Tool Testers
More details
TWT-410 Torque Wrench Test Stand
- Calibration Range: Supports torque wrenches up to 340 Nm
- Sensor Compatibility: Compatible with TT-QC, TT-QCM, TTC and TC-DT sensors
More details
RDF Joint Simulators / Run Down Fixtures
- Required for accurate torque measurement for power-driven torque controlled tools (electric, hydraulic or pneumatic)
More details
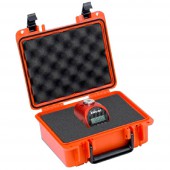
TT-QC-CC Waterproof Carrying Case
- Meets ATA 300 specifications for transit cases and rigorous standards for military use (STANAG 4280, DS 81-41, IP67)
- Injection molded using an advanced patented light-weight high-strength plastic
More details
Specifications
| Calibrated Range | 10-100% Full Scale, bi-directional |
| Accuracy | ±0.5% of indicated (within calibrated range) (±0.25% is optional) |
| Resolution | 4 Active Digits |
| Overload Protection | 200% Full Scale bi-directional |
| Operating Modes | Track, Peak, 1st Peak |
| Data Output | RS-232 |
| Filtering | Selectable; 125Hz, 250Hz, 500Hz, 1000Hz, 1500Hz and 2000Hz |
| Alarm Limits | Panel Mounted LED for Visual Alarm Limits |
| Memory | data storage of up to 999 readings |
| Power | Internal NiMH battery, AC Adapter / Charger (included) |
| Weight | Approximately 1,5 kg, depending on transducer |
| Operating Temperature | 0-50°C |
| Calibration Certificate | Includes NIST Traceable calibration certificate with data |
| Standard Accessories | Joint Simulator for 1/4" & 3/8" drives, AC adapter/Charger |
| Optional Accessories | Joint Simulators for 1/2", 3/4" & 1" Transducers |
Buy Now
Availability: Available: 1 - 3 days, Delivery time: 1 - 3 weeks, special order request


