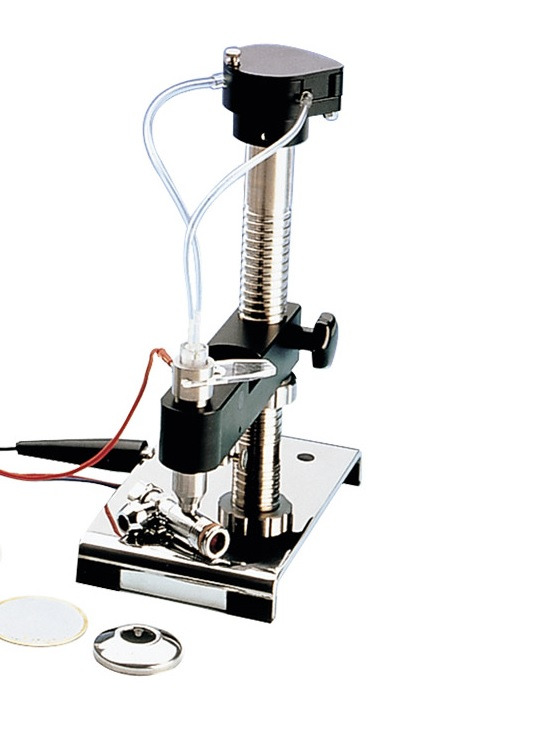
GalvanoTest High-Precision Coating Thickness Gauge
 Based on the Coulometric Principle, the GalvanoTest is an advanced and highly versatile coating thickness gauge. It is designed for the precise measurement of electroplated coatings on a wide range of substrates. Utilising the coulometric principle, this instrument can measure single and multi-layer coatings of materials such as chrome, nickel, brass, and silver, ensuring accurate and reliable measurements without affecting the underlying substrate.
- Extensive Measurement Range: Capable of measuring coatings from 0.05 to 75 µm, suitable for a variety of industrial applications.
- Advanced Coulometric Technology: Provides precise measurements through controlled removal of the coating layer, using electrical current to determine thickness.
- Usage Flexibility: Equipped with different measuring cells to adapt to both flat and curved surfaces, and suitable for measuring on small parts and wires.
- Compatibility with Multiple Substrates: Capable of measuring on both metallic and non-metallic bases, offering a comprehensive solution for almost all electroplated coatings.
- Non-Destructive Measurements: The coulometric technique ensures the substrate remains intact, ideal for sensitive applications.
- Easy to Operate: Requires no specialised knowledge for use, with an intuitive menu that facilitates all operations and settings.
- Data Documentation and Analysis: Includes connectivity options with printers and PCs for detailed documentation and analysis of measurement results.
- GalvanoTest 2000: Uses a pulsator nozzle system to move the electrolyte, suitable for standard measurements.
- GalvanoTest 3000: Features a pumping system that moves large volumes of electrolyte, facilitating rapid serial measurements and suitable for use on very small parts or for measuring gold layers.
Contact us for more information on how the GalvanoTest can provide precise and reliable coating measurements for your quality control needs and maintaining industrial standards.
Features
- High Data Storage Capacity: Can store up to 250,000 readings, facilitating the management of large volumes of data.
- Special Accessories: Available with a range of special accessories for specific measurements, including cathodic vessels for wire measurements.
- Advanced Analysis Software: Comes with the MSoft 7000 Basic Edition software for thorough evaluation and data export in various formats.
GalvanoTest 2000
The GalvanoTest 2000 is supplied as a complete kit that includes:
- GalvanoTest
- Interface for connection to MiniPrint data printer or PC
- Data port for Y-T recorder
- Standard measuring stand with measuring cell and air pulsator nozzle
- Connection cable between the device and the measuring stand
- Gasket A (8 mm²)
- Gasket B (4 mm²)
- 3 bottles of electrolyte (100 ml each)
- Pipettes
- Bottle for electrolyte waste
- Spray bottle for distilled water
- Rubber pencil
- Pack of absorbent paper
- User manual
GalvanoTest 3000
The GalvanoTest 3000 is supplied as a complete kit that includes:
- GalvanoTest
- Interface for connection to MiniPrint data printer or PC
- Data port for Y-T recorder
- Measuring stand with integrated circulating pump
- Connection cable between the device and the stand
- 2 B gaskets (4 mm²)
- 20 C masks (1 mm²) and 2 gaskets of Ø 15 mm to seal the masks
- 20 D masks (0.25 mm²)
- 5 bottles of electrolyte (100 ml each)
- Bottle for electrolyte waste
- Spray bottle
- Rubber pencil
- Pack of absorbent paper
- User manual
| Coating / Base Material | Lead | Lead/Tin | Chrome | Electroless Nickel | Cadmium | Gold*** | Copper | Brass | Nickel | Silver | Zinc | Tin | Tin/Zinc 78/22 |
|---|---|---|---|---|---|---|---|---|---|---|---|---|---|
| Non metallic | E 15 | E 4 | E 11 | E 17 | E 5 | E 4 | E 4 | E 14 | E 4 | E 6 | E 7 | E 7 | |
| Steel | E 15 | E 4 | E 11* | E 17* | E 5* | E 4* | E 4 | E 14* | E 4* | E 20* | E 7* | E 7 | |
| Copper | E 15 | E 4 | E 7* | E 5* | E 14* | E 8* | E 6* | E 9* | E 7 | ||||
| Brass | E 15 | E 4 | E 7* | E 5* | E 12 | E 14* | E 8* | E 6* | E 9*** | E 7 | |||
| Aluminium | E 15 | E 4 | E 11* | E 17* | E 5 | E 4* | E 4 | E 14 | E 4 | E 6** | E 11** | ||
| Bronze | E 8 | E 7 | |||||||||||
| Nickel | E 15 | E 11* | E 5 | E 4 | E 4* | E 4 | E 6 | E 7 | |||||
| Nickel-silver | E 8 | E 7 | |||||||||||
| Zinc diecast | E 12 | ||||||||||||
| Zinc | E 12* | ||||||||||||
| Kovar | E 15 | E 4 | |||||||||||
| Silicon | E 14 | ||||||||||||
| Silver | E 15 | ||||||||||||
| Cadmium | E 7 | ||||||||||||
Electrolyte: E4, E7, E9, E11, E17 are categorized as hazarddous good - involves higher transport charges! * Thickness standards are available ** Use internal cell type II *** Sample necessary (only GalvanoTest 3000) |
|||||||||||||
| GalvanoTest Features | Type 2000 | Type 3000 | |
|---|---|---|---|
| Coating/Substrate Combinations | More than 70 coating/substrate combinations (standard version) | ||
| Coatings on flat and curved surfaces | |||
| Coatings on small components and wires | |||
| 10 preset types of metal: Cr, Ni, Cu, brass, Zn, Ag, Sn, Pb, Cd, Au | |||
| 19 preset types of metal: Cr, Ni, Cu, brass, Zn, Ag, Sn, Pb, Cd | |||
| 8 further metal coatings for special applications | |||
| 1 further metal coatings for special application | |||
| measuring range: 0.05 ... 75 µm | |||
| Measuring cell | With circulation pump | ||
| With air pulsator | |||
| Measuring surface | Gasket 8 mm²/12.4 x 10⁻³ inch² | ||
| Gasket 4 mm²/6.2 x 10⁻³ inch² | |||
| Mask 1 mm²/1.55 x 10⁻³ inch² | |||
| Mask 0.25 mm²/0.388 x 10⁻³ inch² (depleted area barely visible) | |||
| Electrolyte cup 0.25 mm² to approx. 16 mm²/0.388–24.8 x 10⁻³ inch² (optional) | |||
| Adjustable settings for optimum results | Maximum of 8 depainting speeds in the range of approx. 0.3–40 µm (0.012–1.57 mils)/min | ||
| Directly adjustable calibration factors; individual setting according to metal type and measuring surface | |||
| Calibration setting with the aid of thickness standards | |||
| Variable shut-down speed to suppress interference or for measuring alloy zones between coating and substrate | |||
| Data storage with GalvanoTest | Number of memories for various metals * | ||
| Number of readings which can be stored and evaluated ** | |||
| Non-volatile memory retains all calibration settings, readings and statistical values after the gauge has been switched off | |||
| Statistical evaluation | Display of 6 statistical values – mean value, standard deviation, coefficient of variation, number of readings, highest and lowest single reading | ||
| Immediate or delayed display of statistical values | |||
| Immediate or delayed print-out/transfer of readings and statistics (available as an option) | |||
| Display and print-out of data and time – year, month, day, hour and minute | |||
| GalvanoTest interfaces for peripheral devices | Interface for MiniPrint data printer | ||
| Interface for an RS 232 C for connection to a PC | |||
| Analog output for connection to an x-t recorder to chart voltage curve | |||
| Electrolyte alarm/saturation indicator | |||
| Measuring uncertainty | 5% of reading on a measuring area of 8 mm² after calibration | ||
| Power supply | 110/220 V — 50.0 ... 60.0 Hz/10 Watt | ||
| Dimensions/weight | Gauge: 260 mm x 250 mm x 100 mm/10.24 inch, 9.85 inch, 3.94 inch; approx. 2.5 kg | ||
| Standard support approx. 2.5 kg | |||
| Support with integrated pump approx. 3.0 kg | |||
| Measuring range: 0.05 ... 75 microns | |||
| Additional features of the GalvanoTest | Print-out diagram showing measuring cell voltage levels over the coating; especially useful for detecting alloys between coating and substrate; with MiniPrint (available as an option) | ||
| Operator guide to the alphanumeric displays with language option: German, French or English | |||
| Unit of measurement in either metric (µm) or British system (mils) | |||
| When switched on, the gauge displays details of the last readings | |||
| Illuminated voltmeter for monitoring the deplating process | |||
| Easy to use – clearly-designed controls and easy-to-follow operating instructions with numerous examples | |||
| Wide range of extras for measurements on small components, wire and multi-layer coatings | |||
* Number of memories for various metals ** Number of readings which can be stored and evaluated |
|||
Buy Now
Availability: Available: 1 - 3 days, Delivery time: 1 - 3 weeks, special order request


