TI-CMXDLP-C Ultrasonic Thickness Gauge
The TI-CMXDLP-C Ultrasonic Thickness Gauge is no longer available and has been replaced by TI-CMX Series.
Click here to see the TI-CMX Series.
Advanced Technology in a Colourful Design
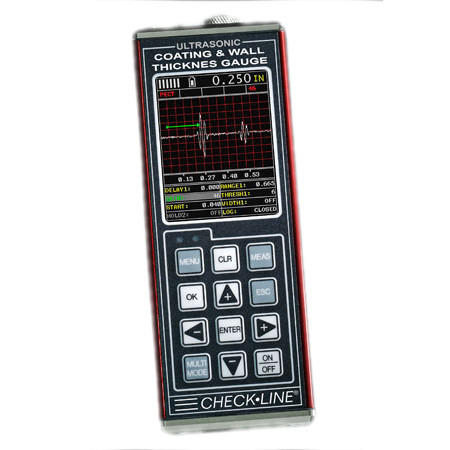
Discover the TI-CMXDLP-C from Checkline, a colourful and advanced version of the standard TI-CMXDLP model, which combines ultrasonic precision with an A-Scan visual interface to display actual waveform echoes. This feature is crucial for professionals who require precise adjustments in challenging measurement applications.
Key Features:- Advanced A-Scan Display: Allows optimal tuning for obtaining high-precision results, displaying detailed waveform shapes for a deeper evaluation of the inspected materials.
- Large Colour Display: Backlit with customizable settings for clear viewing under various lighting conditions.
- E-EV Mode (Echo-Echo-Verify): Also known as triple echo mode, it uses additional echoes to confirm measurement accuracy, ideal for applications requiring meticulous data validation.
- Ultra-Fast Processing: Updates the display up to 60 times per second, facilitating quick and efficient measurements.
- Measurement Versatility: Capable of precisely measuring both wall and coating thickness from one side, with specialized modes including Thru-Coat and Coating Only.
- Robust and Ergonomic Design: Suitable for demanding industrial environments with a housing that offers protection and durability.
This device is a superior choice for those in industries that require high-precision measurement equipment with advanced display and analysis capabilities, offering not only performance but also the convenience of a colour interface that enhances the user experience.
Features
- Auto probe recognition with Auto Zero or Manual Zero.
- Wide variety of dual-element probes can be used for nearly any application.
- Bar graph with user-set start end values providing highest resolution around the target thickness value.
- Differential Mode allows user to set a "target thickness value" and display will show the DIFFERENCE between actual and target thickness as a plus or minus value.
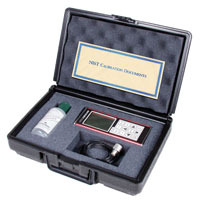
- Includes NIST-Traceable Calibration.
- Adjustable Gain in 5 steps (VLow, Low, Med, Hi & VHi) in 2db increments providing a 8 db gain adjust range (42–50 db).
- 64 custom setups can be stored and retrieved for convenient use and labeled for easy identification
- Display Hi/Lo Alarm Limits with audible and visual indicators.
- CE Certified
- 2 Year Warranty
- Metal housing provides strong protection against harsh environments.
- IP65 protection class
| Model | CMX | CMX-DL | CMX DLP | CMX-DLP-C |
|---|---|---|---|---|
| Display Mode | ||||
| Material thickness digits display | Yes | Yes | Yes | Yes |
| B-Scan cross sectional display | Yes | Yes | Yes | Yes |
| Combined B-Scan and digits display | Yes | Yes | Yes | Yes |
| Coating Thickness Display | Yes | Yes | Yes | Yes |
| Scan Bar Display | Yes | Yes | Yes | Yes |
| A-Scan Display | - | - | - | + Rectified, - Rectified, Full Waveform (RF) Portrait & landscape views |
| Measurement Range | PE: 0.63 - 1219.2mm (0.025 - 48”) PETP: 0.63 - 1219.2mm (0.025 - 48”) EE: 2.54 - 152.4mm (0.100 - 6.0“) EEV: 1.27 - 25.4mm (0.050 - 1.0”) CT: 0.01 - 2.54mm (0.0005 - 0.100”) PECT: 0.63 - 1219.2mm (0.025 - 48”) PECT: 0.01 - 2.54mm (0.001 - 0.100") | PE: 0.63 - 1219.2mm (0.025 - 48”) PETP: 0.63 - 1219.2mm (0.025 - 48”) EE: 2.54 - 152.4mm (0.100 - 6.0“) EEV: 1.27 - 25.4mm (0.050 - 1.0”) CT: 0.01 - 2.54mm (0.0005 - 0.100”) PECT: 0.63 - 1219.2mm (0.025 - 48”) PECT: 0.01 - 2.54mm (0.001 - 0.100") | PE: 0.63 - 1219.2mm (0.025 - 48”) PETP: 0.63 - 1219.2mm (0.025 - 48”) EE: 2.54 - 152.4mm (0.100 - 6.0“) EEV: 1.27 - 25.4mm (0.050 - 1.0”) CT: 0.01 - 2.54mm (0.0005 - 0.100”) PECT: 0.63 - 1219.2mm (0.025 - 48”) PECT: 0.01 - 2.54mm (0.001 - 0.100") | PE: 0.63 - 1219.2mm (0.025 - 48”) PETP: 0.63 - 1219.2mm (0.025 - 48”) EE: 2.54 - 152.4mm (0.100 - 6.0“) EEV: 1.27 - 25.4mm (0.050 - 1.0”) CT: 0.01 - 2.54mm (0.0005 - 0.100”) PECT: 0.63 - 1219.2mm (0.025 - 48”) PECT: 0.01 - 2.54mm (0.001 - 0.100") |
| Measurement Rate | ||||
| Manual | 8 readings per second | 8 readings per second | 8 readings per second | 8 readings per second |
| Scan Mode | 250 readings per second | 250 readings per second | 50 readings per second | 50 readings per second |
| Scan bar display | 10 readings per second | 10 readings per second | 10 readings per second | 10 readings per second |
| Measurement Resolution | 0.01mm (0.001”) | 0.01mm (0.001”) | 0.01mm (0.001”), 0.001mm (0.0001”) selectable | 0.01mm (0.001”), 0.001mm (0.0001”) selectable |
| Velocity Calibration Range | 309.88 - 18,542m/s (0.0122 - 0.7300in/µs) | 309.88 - 18,542m/s (0.0122 - 0.7300in/µs) | 309.88 - 18,542m/s (0.0122 - 0.7300in/µs) | 309.88 - 18,542m/s (0.0122 - 0.7300in/µs) |
| Additional Features | ||||
| High Speed Scan Mode | - | - | - | Yes |
| Differential Mode | - | - | - | Yes |
| Limit alarm mode | - | - | - | Yes |
| B-Scan DisplCalibration Optionsay Speed | 15 readings per second | 15 readings per second | 15 readings per second | 10 to 200 readings per second |
| Flaw Mode | - | - | Basic prove-up flaw detection using single element angle beam transducers- | Basic prove-up flaw detection using single element angle beam transducers |
| Calibration Setups | - | - | - | 64 user-definable setups transferable to and from a PC archive |
| Gates | - | - | 3 fully adjustable gates: start, stop, width & threshold | 3 fully adjustable gates: start, stop, width & threshold |
| Damping | - | - | Adjustable damping (50 - 1500ohms) | Adjustable damping (50 - 1500ohms) |
| Pulser Type | Dual square wave pulsers Pulse repetition frequency up to 250Hz | Dual square wave pulsers Pulse repetition frequency up to 250Hz | Dual square wave pulsers Pulse repetition frequency up to 250Hz | Dual square wave pulsers Pulse repetition frequency up to 250Hz |
| Gain | Manual or automatic gain control (AGC) with 110dB range (limited) | Manual or automatic gain control (AGC) with 110dB range (limited) | Manual, automatic gain control (AGC) with 110dB range (limited), Linear time dependent gain (TDG) with adjustable slope | Manual, automatic gain control (AGC) with 110dB range (limited), Linear time dependent gain (TDG) with adjustable slope |
| Timing | Precision temperature controlled crystal oscillator (TCXO) timing with single shot 100MHz 8bit ultra-low power digitizer | Precision temperature controlled crystal oscillator (TCXO) timing with single shot 100MHz 8bit ultra-low power digitizer | Precision temperature controlled crystal oscillator (TCXO) timing with single shot 100MHz 8bit ultra-low power digitizer | Precision temperature controlled crystal oscillator (TCXO) timing with single shot 100MHz 8bit ultra-low power digitizer |
| Memory and Data Logging | • 4GB internal memory • Sequential and grid logging • Alpha numeric batch identification • OBSTRUCT indicates inaccessible locations • Bitmap graphic capture and capture viewer | • 4GB internal memory • Sequential and grid logging • Alpha numeric batch identification • OBSTRUCT indicates inaccessible locations • Bitmap graphic capture and capture viewer | • 4GB internal memory • Sequential and grid logging • Alpha numeric batch identification • OBSTRUCT indicates inaccessible locations • Bitmap graphic capture and capture viewer | • 4GB internal memory • Sequential and grid logging • Alpha numeric batch identification • OBSTRUCT indicates inaccessible locations • Bitmap graphic capture and capture viewer |
| Calibration Options | ||||
| 1 - point | Yes | Yes | Yes | Yes |
| 2 - point | Yes | Yes | Yes | Yes |
| Material selection | Yes | Yes | Yes | Yes |
| Velocity (speed of sound) | Yes | Yes | Yes | Yes |
| Transducer Probe Type | Dual element | Dual element | Dual element | Dual Element, Single Element (1 - 20Mhz), Contact, Matching Layer, Delay Line and Pencil |
| Transducer Frequency Range | 1 - 10MHz | 1 - 10MHz | 1 - 10MHz | 1 - 20MHz |
| Transducer Recognition | Automatic & manual - selectable from a list | Automatic & manual - selectable from a list | Automatic & manual - selectable from a list | Automatic & manual - selectable from a list |
| V-path / dual path error correction | Automatic | Automatic | Automatic | Automatic |
| Probe Zero | Automatic & manual (via integrated probe disk) | Automatic & manual (via integrated probe disk) | Automatic & manual (via integrated probe disk) | Automatic & manual (via integrated probe disk) |
| Display | 1/8 VGA (greyscale) 62 x 45.7mm (2.4 x 1.8”) viewable area | 1/8 VGA (greyscale) 62 x 45.7mm (2.4 x 1.8”) viewable area | 1/8 VGA (greyscale) 62 x 45.7mm (2.4 x 1.8”) viewable area | 1/4 VGA AMOLED colour display 57.6 x 43.2mm (2.27 x 1.78”) viewable area Landscape Mode |
| Display Refresh Rate | 25Hz | 25Hz | 25Hz | 120Hz |
| Units (selectable) | mm or inches | mm or inches | mm or inches | mm or inches |
| LED Backlight | on/off/auto | on/off/auto | on/off/auto | on/off/auto |
| Repeatability / Stability Indicator | Yes | Yes | Yes | Yes |
| Battery Save Mode | Auto | Auto | Auto | Auto |
| Measuring range & accuracy depends on material, surface conditions and the transducer selected | ||||
- Built-in memory with USB-C output for transferring data to a computer
- No additional software required, gauge operates as mass storage
- Data Files can be user-set for a "grid type" structure where data is formatted in Rows & Columns or a "sequential" file where all data appears in a single column
- Each "grid type" File can be set for up to 999 rows by 52 columns
- Each "sequential" File can be set for up to 512 rows by 1 column
- Each File can be set for "data only" or as "data plus B-scan Graphic". Memory Capacity is over 225,000 data values or over 16,000 data values with B-scan
|
|
||||
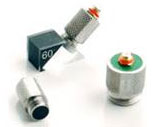
| Description: | Threaded shear wave transducers for quickly interchanging between wedges. Ideal for limited access and curved surfaces. | |||
| Used: | General weld inspection | |||
| Damping: | High gain (G), Resolution(R) *Specify damping after (QC), No damping on 3.5 MHz | |||
| Connectors: | Microdot | |||
| Element Size | 2.25 MHz | 3.5 MHz | 5.0 MHz | 10.0 MHz |
| .250" dia. | QC2525 | - | QC2550 | QC2510 |
| .375" dia. | QC3725 | - | QC3750 | QC3710 |
| .500" dia. | QC5025 | PQC5035 | QC5050 | QC5010 |
 |
|||
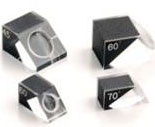
| Wedges for quick change- Customized angles available upon request | |||
| Element size | .250" Diameter | .375" Diameter | .500" Diameter |
| 45° | QW2545 | QW3745 | QW5045 |
| 60° | QW2560 | QW3760 | QW5060 |
| 70° | QW2570 | QW3770 | QW5070 |
| Minimum Radius for Convex Surfaces | 8.89 mm | |
| Minimum Radius for Concave Surfaces | 76.2 mm | |
| Minimum Headroom | 25.4 mm | |
| Minimum Sample Diameter | 3.8 mm | |
| Minimum Substrate Thickness - F | NA | |
| Minimum Substrate Thickness - NFe | NA |
Related Products
TI-CMXDLP Ultrasonic Thickness Gauge
- Wide variety of dual-element probes can be used for nearly any application.
- Bar graph with user-set start end values providing highest resolution around the target thickness value.
- Auto probe recognition with Auto Zero or Manual Zero.
More details
Accessories
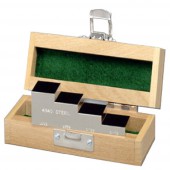
TI-SB Ultrasonic Thickness Gauge Accessories
- Precision Machined and Finished
- Includes NIST Report and Test Data
- Includes Wooden Storage Box
More details
TI-SB4 Steel Test Block
- Uncertified Steel Test Block
- For convenient confirmation of thickness gauge calibration
More details
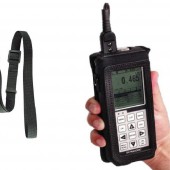
TICC-MVX Instrument Holder for Ultrasonic Gauges
- Constructed from heavy duty Cordura Nylon
- Built-in belt loop
- Includes wrist & shoulder straps
More details
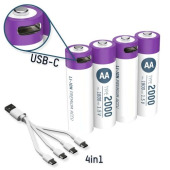
LI-ION Rechargeable AA Batteries
- Li-Ion rechargeable battery
- Stable voltage of 1,5 V over 95% of the runtime
- Charged via the USB to USB-C cable
More details
Specifications
| Mesuring range on steel: | Pulse-Echo Mode: Pit and Flaw detection measures from 0.025 - 9.999inches (0.63 to 254 millimeters) Echo-Echo Mode: Thru Paint & coatings measures from 0.1 - 4.0 inches (2.54 to 102 mm). Pulse-Echo-Coating Mode: 0.63 to 254 millimeters & Coating 0.01 to 2.54mm Range will vary +/- depending on the thickness of the coating. |
| Max Coating: | 2.54mm |
| Resolution: | 0.01mm |
| Velocity: | 1250 to 9999 meters/sec .0492 to .3936 in./ms |
| Measurement modes: | - Pulse-Echo (corrosion mode) - Pulse-Echo Coating (Corrosion w/o coating) - Echo-Echo (thru-paint) - Temp Comp (auto adjust for material temp) - Coating Only (Ultrasonic Coating Gauge) |
| Units: | Inch or mm |
| Probe Types: | Dual Element (1 to 10 MHz). |
| Output: | USB-C Mass Storage no additional software required |
| Memory capacity: | 4 gb internal SD card >200.000 measurements |
| Power Source: | Three 1.5V alkaline or 1.2V NiCad AA cells |
| Battery Life: | Typically operates for 150 hours on alkaline and 100 hours on NiCad |
| Auto Power off: | After 5 minutes of non-use |
| Display: | 1/4" VGA AMOLED Display 43,2 x 57,6 mm |
| Screen Refresh Rate | 120 Hz |
| Keyboard: | Membrane switch with twelve tactile keys |
| Case: | Extruded aluminum body with nickel-plated aluminum end caps (gasket sealed). |
| Temp. Limits: | Ambient: -30 to 50° C (-20 to 120° F) Material:20 to 100° C( -0 to 200° F) Special high temperature probes are optionally available. |
| Weight, net: | 383 grams |
| Dimensions: | 63.5 W x 165 H x 31.5 D mm |
| Guarantee: | 2 years |

